 |
| Homemade Snicker Bars |
1st Layer: Chocolate Peanut Butter

 2nd Layer: Nougat


- 1 1/4 cups milk chocolate chips
- 1/4 cup peanut butter

Grease your 9x13 baking pan with butter. Melt ingredients together in the microwave, then pour into the baking dish and spread until even. Place pan into the fridge and allow to cool and harden.

- 1/4 cup butter
- 1 cup granulated sugar
- 1/4 cup milk
- 7 ounce jar marshmallow fluff
- 1/4 cup peanut butter
- 1 1/2 cup chopped salted peanuts
- 1 tsp vanilla extract

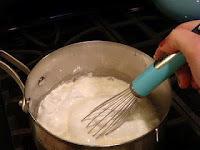
Melt butter in a saucepan over medium heat. Add in sugar and milk, stirring
until dissolved and bring to a boil. Let cook for 5 minutes, stirring
occasionally. Add in fluff, peanut butter and vanilla, stirring until smooth.
Turn off heat and fold in peanuts, then pour over bottom chocolate layer. Place
into the fridge allow it to cool and set completely.

3rd Layer: Caramel:
- 1 14-ounce bag of caramels
- 1/4 cup whipping cream
- 1 teaspoon vanilla extract

Combine ingredients in a saucepan over low heat. Let melt, stirring
occasionally, until smooth. Pour over nougat layer and let cool completely in
the fridge until set.

4th Layer: Chocolate Peanut Butter:
- 1 1/4 cups milk chocolate chips
- 1/4 cup peanut butter

Melt ingredients together in the microwave, then pour over caramel and spread
until even. Allow the final layer to cool and harden in the fridge.

Keep in mind that this recipe takes some time because you have to allow each
layer to cool and set before moving on to the next layer. Trust me, it is
totally worth it! I stored my bars in the fridge. You may need to let them set
out for a few minutes to soften before cutting.
Enjoy!
Making Homemade Snickers, Part Two
Okay, so this is part two of the making the Snicks, aka Snickers. In the late afternoon I came back and whipped up the peanut butter nougat type layer. It was a tad sticky, but dried fast so I needed to work efficiently to work it out across the carame/peanut layer.

I found the best way to
go about it was to use a cookie scoop to drop the mixture across the
caramel/peanut layer. Then I used a smooth edged butter knife to spread the
mixture evenly.

I used my pastry cutter to cut the candy into fun size bars. This was very easy, I highly recommend using the pastry cutter for this step.

I enjoyed making this recipe because unlike truffles and many of ther candies I dip into chocolate, this required no refrigeration or freezing to set before dipping. The caramel is soft and buttery with peanuts in it, but firm enough that it holds its shape. I began the tempering process of milk chocolate for my final step.

After tempering I began to dip the bars into the milk chocolate. These bars were by far the easiest thing I have ever dipped into chocolate. They came off of my dipping tool easily and without making a mess.

Enjoy!